Videos
How to install a Velux Centre-Pivot Roof Window - Part 1
Unboxing the window and preparing for installation
In this four part guide, Mark Dymond – Velux Technician installs a Velux GGU Centre Pivot Roof Window onto an Interlocking Tile Roof. Demonstrating the installation of the BDX Insulation Collar and EDW Flashing Kit for Redland 49 Tiles.
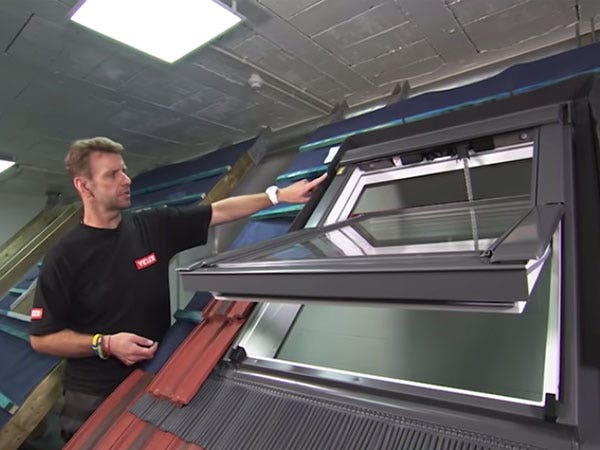
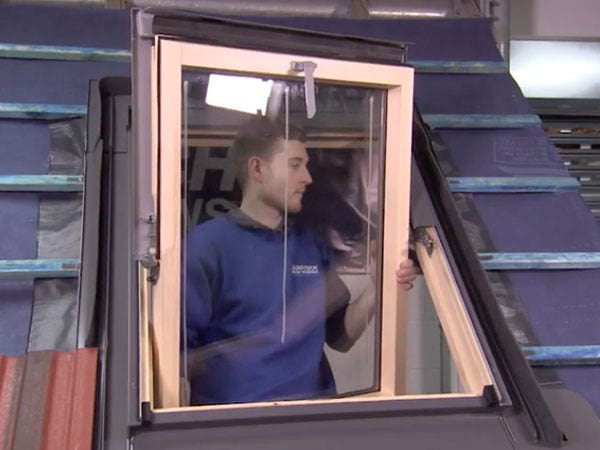
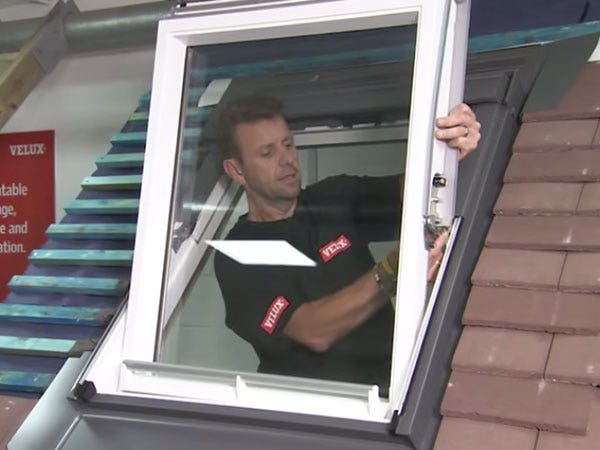
In Part one, Mark takes us through how to unbox the window, engage the Ventilation Bar, disengage the Sash from the frame and fit the brackets ready for installation. If you'd like to know how to fit a Velux window, this is one article you shouldn't skip.
View the other parts here:
Part 2: Fitting the Insulation Collar and checking the Frame is square and level
Part 3: Underfelt collar and Transverse Drainage Gutter Installation
Part 4: Installing the Flashing Kit and finishing the installation
Video Transcription for Fitting a Velux Window
Understanding the labels
Hi, I'm Mark Dymond from Velux and I’m here today at JJ Roofing Supplies to take you through the installation of one of our white polyurethane centre pivot windows with installation products and flashing for plain tiles. So we'll begin by looking at the carton labels. You'll find a very similar layout on all of our cartons, whether they're windows, flashings or installation products. But it's worth having a little look so you can understand the contents of the box before you go ahead and open up the roof. So our first line here refers to the style of window that you have. Now, we don't expect you to learn all of our coding systems, so we back this up with a simple graphic here. So you can see from the graphic it's a centre pivot window and the white tone here is showing it's the polyurethane finish. The mid-line here is the external frame size. Again, without needing to learn all of the coding, we give you the size in centimetres beside that. This final line refers mainly to the colour of the internal and the external finishes and the final two digits refer to the glazing style. So we can see from here the '00' basically telling us this is the standard grey external finish and white polyurethane internal. Here, we have the overall weight of the carton, so useful to know when it comes to transporting it around the site or anywhere that you actually happen to have the product. So you know if it's safe to handle with a single individual. You can also find in the opposite corner here the roof pitches that the product is designed to be installed into. And you'll notice that 15 degrees is always the minimum for fitting Velux roof windows and the shallowest our windows can go down to.
Finally, we have our QR code for this part of fitting Velux windows. You'll find the QR codes on several of our cartons and if you scan one of these, it gives you a handy animated clip showing the installation of this particular part of the installation process. So, in effect, it replicates what you'll find in the introductions for fitting Velux windows. So coming down to the bottom of the box, you'll see several other symbols. This one is basically telling you which way the box should be stored upright, whenever you have them either onsite or what have you. The wine glass is basically advising you this is a fragile product, obviously containing glass. The carton itself shouldn’t be allowed to get wet. Obviously, it's cardboard; it's just going to make it difficult to manoeuvre if the window falls out of the bottom end of the box. And this last symbol shows one of the many improvements we've made not just to the window but obviously, to the carton itself. In that you no longer need a knife to open the box.
Unboxing the window
So, we've now incorporated simple perforated strips which will allow you to just peel the box apart, as indicated with this symbol here. So we'll pop these two tabs in and that allows us to just open up this end and then carry on on all four sides until the box is completely flat packed. So you can see when you open up the box, the instructions will always be packaged directly on top of the glass so they are easily accessible for you to be able to follow the next stage if you wish. Alternatively, again, you could scan this QR code which is the same as the one on the front of the carton and that will take you through this next part of the process which is how to remove the glazing unit or the actual sash to take out the heaviest part of the window, and then fit the brackets ready for installation. But I’m going to take you through that part now on the video.
Firstly, we need to remove the cardboard packaging that you'll find on either side of the window, which is there just to protect the window during transportation. So just peel the card away and you’ll find there's a couple of staples left in which you want to remove, just to avoid them getting in the way of the flashings when we come to fit the flashings later on. Come around to the other side, and do the same again. And then the next thing we need to remove is this box at the top. This isn't packaging, so you'll see when I remove this box, it contains a valuable part of the installation process. So this box should just be placed to one side for safe keeping and we need this towards the end of the installation. Now, at the base of the window here, you'll see some polystyrene which again, is here to protect the base of the window, particularly this section of aluminium and contained within that is the box that you'll find the installation brackets, screws and packing pieces if we need to use that for levelling up the window. We don't want to remove this at this stage because we are now going to elevate the window up onto this face to make it easier to to remove the sash. So we'll keep everything here because this box will help give the polystyrene a little bit of additional support.
Lifting the window and removing the sash from the frame
If you place your hands just underneath these little notches that have been cut away in the corners of the frame, start to lift and as you get about a quarter of the way up, just push forwards and it rocks on the polystyrene. And that then allows the window to stay completely upright.
You can now remove the envelope that would usually be stuck to the glass but may have come loose in transit, and that is information for the customer so we won't need that at this stage. So before we can open up the sash itself, we need to engage the ventilation bar. You'll see the ventilation bar isn't connected at this stage and that's because we keep this tucked inside the reveal to keep the cartons as slim as possible, thereby minimising waste packaging.
From here, what you need to do is grab this block of polystyrene, ease that out and discard. And just make sure none of the polystyrene has been left stuck inside here. Otherwise that can prevent simple operation of the ventilation bar and affect fitting a Velux window. Now, you can see the vent bar is free to move and we're just going to bring this up until this crescent shaped section hooks into the bar at the end of the locking mechanism and you will hear it click. Now, everything is engaged and ready to go. With the vent bar engaged, we can now pull backwards and the locking mechanism opens up for us.
Now, we're going to fully rotate this sash so it's basically going to be resting on this end. Obviously with it being a nice white window, we want to keep it as clean and protect it as best we can. To do that, we remove these polystyrene blocks here, rotate them around and just plug them onto that ventilation bridge. Do the same on this side and plug that on. And now when we rotate, these blocks are going to actually rest on the floor themselves, keeping the window clean. Start to flip this around and then angle the window a little bit. If you're doing this by yourself, you can still lean outside, grab the bottom end of the sash and start to bring it around. And whilst you do that, lean the frame back further so that you can keep the sash completely upright. Eventually, that comes to rest, so the sash is now nice and upright and you can come around and just support the frame with your thigh. The next thing we're going to try and access are these little release buttons that you'll find on both sides of the hinges.
We'll see this little release button here. We're going to have to pop that in to enable the sash hinge to come away from the frame hinge. Just above the button, you'll see the word 'Press' so it's an easy locator for you and it's also making it known what we need to do next. Now, you may be able to get in with your thumb or your finger and push that button in. If not, just use a pair of pliers, screwdriver or something similar so as long as you've got something with a flat end that will allow you to get into the button, and pop that in. With both buttons pushed in, we can now separate the frame and the hinge - the frame and the sash even... Lower the frame onto the floor and then move the sash to one side for safe keeping for fitting Velux windows later.
Installing the brackets for fitting a Velux window
With the window on its end, it makes it a little easier for me to show you the two different coloured lines that you'll see running down the side of the frame. These refer to the two different installation heights when fitting a Velux window. You have your red line for standard installations and blue for recessed. And you'll see that reference on the front of the installation instructions where we're advising you to make sure you've consulted the front of the flashing carton where you'll find either a red of a blue square. That then advises exactly how you should frame out the roof itself, based on the different flashing variations but also where the brackets are going to be located on the sash. But I’m going to show you that now as part of the video. As you can see here on the side of the frame, we have these sections that have already been cut into the polyurethane itself where you have got a long slot here, two small pilot holes and a squared off cutaway section. That's to incorporate the bracket. So if this were to be a recessed installation, our brackets would be going on either side of the window. So what you're going to find is this large tab in the middle of the bracket is going to locate into this hole. And the ridge that you see running along the base should drop into this line here. So if you were to try and fit them upside down, you would generally imagine that if the bracket is rocking like so, it's not right. That's because when fitted correctly, it will lock into place so you've got that element of rigidity prior to installing your two screws.
Notice now how the blue line runs in line with the actual bracket as a guide for fitting Velux windows. But as we are going to be fitting this as a standard red line installation, we're going to be following that red line around to the pre-formed openings that you’ll find at the top and bottom of the window itself. Exactly the same layout as you'll find on the side so there is only one way the brackets can be fitted. So we'll take our bracket and we'll pop that into place. And then from the box, we'll take out the bag of screws where you'll find four 80mm screws and for this size of window, thirteen 30mm screws. And it's the small screws that you'll use at this stage to fix the brackets to the frame. So we'll just secure the top two brackets. So we'll now fit the second bracket in place and once this one is in, we can flip the frame over because having removed the sash, we've taken the heaviest part of the window away so there is no fear of damage to the brackets. And now carry on the process for the two bottom brackets. Once the final bracket is in place, we'll lay the frame flat on the ground, ready to allow us to insulate the opening.


