Videos
How to install a Velux Centre-Pivot Roof Window - Part 2
Installing the BDX Insulation collar and checking the window and frame sit level
In this 4 part guide, Mark Dymond – Velux Technician installs a Velux GGU Centre Pivot Roof Window onto an Interlocking Tile Roof. Demonstrating the installation of the BDX Insulation Collar and EDW Flashing Kit for Redland 49 Tiles.
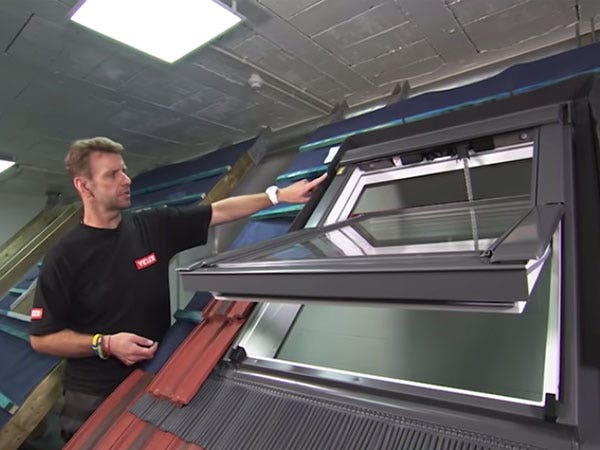
In Part 2, we demonstrate how to assemble and fit the BDX Insulation Collar before attaching the frame and checking that the sash sits square and level in the frame.
View the other parts here:
Part 1: Unboxing the window and preparing it for installation
Part 3: Underfelt collar and Transverse Drainage Gutter Installation
Part 4: Installing the Flashing Kit and finishing the installation
Video Transcription
The Window Opening
With this style of flashing and slate flashing as well, there is a slight variation on the position that differs from interlocking tile flashing, in that a lot of the time you may get away without having to fit a lower installation batten. Because most of the time, you want to try and aim to install the window directly on an existing tile batten. If you're unable to do that because of the window positioned in comparison to the coursing, you may have to just place a smaller installation batten below an existing tile batten. But the rest of the installation concept follows as you would expect. You need your upper installation batten to be located where you have a clear space of the height of the window plus 45mm tolerance. So as this is a 980mm high window, we should have a clear space of 1025mm. Likewise, on the width, you want the width of the window plus 40-60mm. This will enable us to get adequate insulation. It also provides room for the timber to expand in warmer weather and also gives you a little bit of space to manipulate the frame and move it from one side or the other if things aren't square.
So here, we would want this to be anything from 820mm to 840mm. With the measurements as we would expect, we're now ready to put together our insulation collar, and insulate that opening prior to the window install.
Unboxing and Assembling the Velux BDX Insulation Collar
So now we're ready to fit the insulation collar, I’ll show you the carton labelling layout for that particular item. We can see again on the top row, it references the BDX and to the left of that, it shows you the contents of the box. So we have our insulation collar and the felt collar included. Notice we've got the red square, so it's denoting the fact that this is for a standard height installation, tying in with the fact that we have fitted our brackets to the red line. The midline again, references the size. So we want to make sure that this size code matches that on the window carton. Otherwise, it's telling us this is a different size.
Naturally it's not going to fit. And the final code is basically telling us this is for a single window installation. As before, you can see this symbol here, advising that there is no need for a knife to open up this box and we follow the simple ripcord principle, if you like, that we followed for the windows previously. Here, we have a couple of small tabs, as you can see with this symbol here, showing that we're just going to pop these tabs in, and as you lift this first one, you'll then draw that tab towards you... And then likewise, with the smaller tab at the bottom, pull that away and then you can open up the box and you'll start to see the contents within. Notice we have a separate set of installation instructions purely for the insulation and the under felt collar. This is also covered within the flashing instructions and also the QR code if you scan that in advance. So the only parts that we're going to need for the next stage of the process will be the four sections here which are the insulation collar itself. So you can see the remainder of the contents of the carton is our under felt collar, drainage channel and the accessories to connect these all together, which we’ll come to later in the installation.
With the insulation collar out of the box, we can see we have two shorter sections which cover the top and bottom of the window, two longer sections which we use for the sides. If I show you the side covers here, we can see we have variations on the thicknesses that are available. If you have worked to the maximum 30mm tolerance then we'll use all of this insulation. If you've only allowed for 20mm, this little strip of softer foam here can be peeled off completely. If you’ve only allowed 25mm tolerance either side, there's nothing to worry about as this soft foam will compress where required. So we'll see the insert section by peeling back this corner of soft foam and that’s where when you lift up your top or bottom section, this little L-shaped return here is going to slot into that groove. As it slides down, you'll see that this square tab is going to pop through that little window, if you like, and once it does so, that's it locked together. We repeat the process on the other side, always keeping this extended section here on the outside as that's the part that's going to rest on your battens. Slide that in, clip into place again and once that's in place, flip the whole section over. So when you're clipping the final section, just be aware that it can be a little bit fiddly because things can start to move around. So you may need to just rest that part against you just for a bit of stability as you lock the final parts together. Everything is now clipped in place, so I’m now going to take that inside and feed that through the roof and insulate our opening.
Installing the Velux BDX Insulation Collar
As we feed the insulating collar through, we want to do that sort of lengthways so we take up less space. Bring it out through the opening and then just lower the bottom section in first so we can rest that lip on the bottom batten, saves anything sliding off the roof. As we lower this down, you'll notice the insulation catches on the batten because it's designed to run past that once it's inside. So just ease the insulation beyond the batten. No need to just pull everything in. Just do it nice and gently and it will fall into place. We now have a nice insulated opening, ready for the window frame to drop inside.
Installing the Window Frame
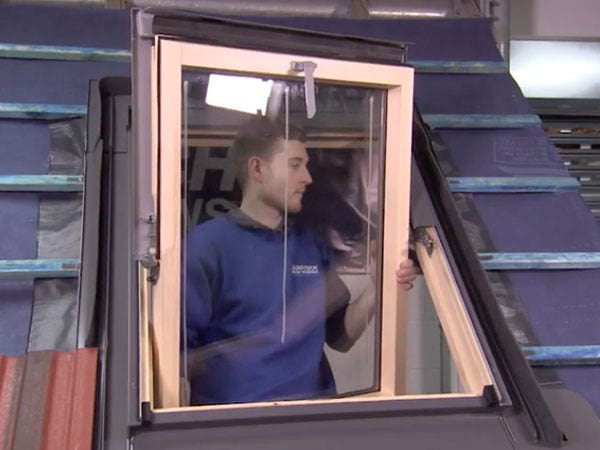
The principle for fitting the window frame is basically the same as we've just followed for the insulation collar. Bring everything through sideways on so we take up as little space as possible. Lower the bottom section in first so as again, to avoid anything sliding off the roof. And then ease the frame back.
As it gets so far, we may start to meet some resistance from the insulation which is expected because it should be nice and tight. What we do is just ease the insulation away and just let the window fall into place. Avoid the temptation of just gripping here and pulling the window down, because although these may feel like handy pockets for your hands, you're only holding onto some insulation and there is a good chance you're going to break it. So ease the insulation away rather than force the window in. Now, we're ready to fix the window into place. So to fix each of our bottom brackets, we now need these two different screws. We have the 30mm screw and the larger 80mm. The 80mm is the key screw. This is going to be going into one of these corner fixing points here because that enables the screw to secure right into your rafter. That's what is going to screw the whole window into the roof structure. If you're unable to use the furthest away one (maybe a nail head or screw head is in the way) choose the closest one to it.
The key thing is we want this screw going into the roof structure. The 30mm screw can go into all of these slots here, and as you'll see, that's going to also then help bond the insulation collar to the window itself. So with those two in, we'll now repeat the process for the opposite bottom bracket. So as with the first bracket, largest screw into the corner. That's now secured it to the roof and then into one of the longer slots. And that's the base of the window secure. Now we're going to move up to the top brackets where at this stage, we only need to partially fix those brackets. But I’m going to show you that next. So for the top brackets, we're now just going to put the 30mm screw in this horizontal, elongated slot. Aim for the middle of the slot so it gives us movement both left and right. And then just partially fix the screw in. Leave it about 10mm proud so if needs be, we can lift that corner up to level. Then do the same in the same horizontal slot on the opposite bracket. So with the screws in place, we're now going to use the sash to check if the frame is square and level.
Re-attaching the Sash to the frame
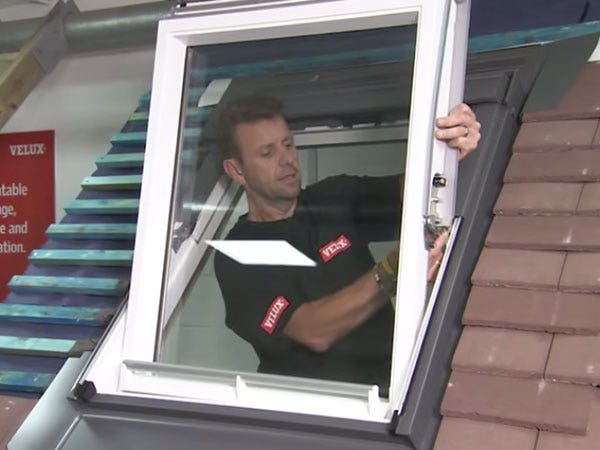
As I’ve mentioned, we're going to use the sash in the frame as our visible guide for square and level. But to insert the sash, it's worth covering what is the comfortable and more secure way of actually lifting it. So for that, you generally want your left hand to be positioned roughly central, just near this rivet point above the hinge.
The reason for that being if you were to hold towards the top, you'll find that as you take the window out, your arm will be extended before you have managed to get the sash completely outside of the frame. If we grip too low down, the window becomes top heavy and on a longer window, it becomes even more likely you may drop it out of the opening and down the roof. So by having it central, it's nicely balance. Your right hand is the key because that’s going to take all of the weight of the window. Your left hand is really balanced. So you want to position your right hand just underneath this corner so you'll feel the catch of the barrel bolt which will mean as you fit it, you're able to take the weight and simply slide your hand along to extend the barrel bolt into the bushing which will secure this corner and enable you to free your right hand up to start guiding the hinges in. So the other key thing to bear in mind is as you lift, to make sure you have a spare pair of hands to be able to remove these polystyrene blocks. Otherwise there is a danger they're going to catch off the bottom of the frame and make it harder to fit the sash. Fitting the sash follows the same principle as we followed up to now. We just take it through sideways, being careful not to catch anything and then as we bring it around, keep it upright and lower in so we can lock that barrel bolt in place. Now I have a free hand, lower the window back in a little bit. Guide that into the mouth of the frame hinge, a little lift and that drops in. Push this end out a fraction, guide that hinge into the frame hinge and a little lift, and everything drops in.
So with the hinges located, we'll undo the barrel bolt and as we bring the sash around, there are two larger barrels that will come into the hinge and start to create some friction. As the window comes to rest, when we push beyond that point, you'll hear two clicks. And that's those buttons that we popped in at the beginning have now popped back out and the sash is now secure. So we can close everything up and we'll start checking inside for square and level.
Checking the window sits square and level
With the sash in place, we can now check to see it's square to the frame. To do that, we're just going to simply look at the gap between the opening sash and the frame itself. And if it's square, the gap at the top will remain constant and marry in with the gap at the bottom. If it were tighter here at the top than it was at the bottom, that would be telling us that the frame needs to move this way to open up. That could be done just by pushing it by hand or if it's a little tight, a little crowbar behind the insulation on the opposite corner will just jimmy things along a little. Like obviously, if it was the other corner that was tight, we'd just move things the opposite way.
Once we have everything nice and square, and an even gap down here, we can open up the window to check the level. Following the same principle, we're just looking to have a little gap of daylight and we again, want the gap at the left to be the same as the gap at the right. That would tell us everything is level. If I push this corner up, we can see that we have now tightened the gap in one corner compared to this right hand side. So if you had an instance where the gap wasn't even, whichever is the tightest corner, you would take the packing piece that's provided and slot that underneath the top bracket on that side and that will open that gap back up again. Once you're happy that the gap is level, we're then ready to remove the sash and work through this opening space and secure those top brackets and carry on with the rest of the installation.
Removing the sash and fully securing the frame
So to remove the sash, we're basically going to follow the installation process but in reverse. So open up the sash and we're going to lock that into place with the barrel bolt, so we know it's going nowhere as we release the buttons. So the small buttons on the hinges, we're just going to pop those in and then we want to hold the sash in the same way we did when we installed it. But firstly, it's key to get the sash in the right place.
If we try to remove it while it's at this angle, there will be too much resistance between the frame and the sash hinge and you'll find it more complicated to remove. If we angle the sash too far away from you, again, it's going to be top heavy and we're in danger of losing it out through the roof. So you want to hold it roughly in the middle and keep everything as upright as possible and that way, you can just ease them out in one smooth movement. Once we have it out, turn it around, again, being careful to bring things through without catching anything and then store it on a clean piece of card inside to keep the top of the sash clean. So as we did at the bottom, we'll take our 80mm screw into the corner, fix that into the roof structure. And then tighten the small 30mm screw that we left 10mm proud. Once we've done this bracket, we'll repeat the process on the opposite side.


