How To Guides
How to repoint ridge tiles
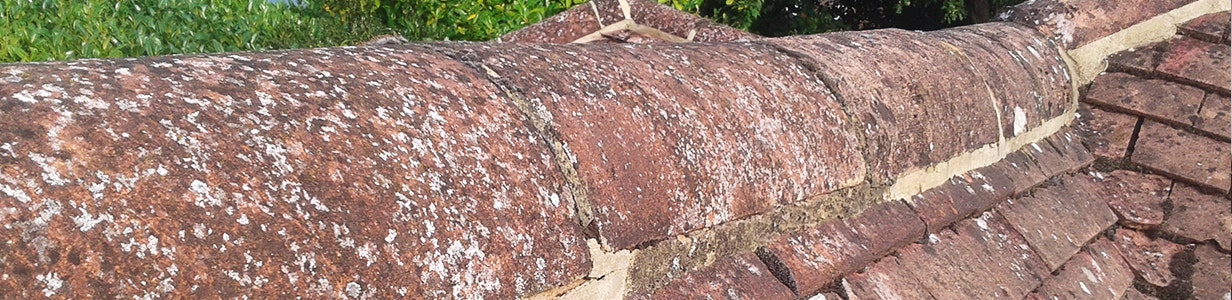
When faced with a damaged or degraded ridge tile what is a homeowner to do?
Until recently the answer seemed to be a simple one. Remove the offending tile, scrape out debris and then bed in a new fitting with a fresh batch of mortar. Often this repair was dealt with at low cost and at high speed either through the use of a local contractor or by the property owner.
But let’s start to pick this apart, firstly how do you or your contractor get up to the ridge to make the repair? Working at such heights on a pitched surface is an extremely dangerous undertaking and without appropriate safety measures an accident will most likely be fatal. Unfortunately such measures add time and cost which is why they are sometimes ignored for what appears to be such a minor repair. Ladders should be checked and secured, scaffold should be installed and inspected by a professional and items such as harnesses and crawl boards should be fit for purpose and properly secured when used. Never ignore safety on your roof even if your contractor is willing to.
You also need to consider your roof tiles. The roof is not designed to withstand foot traffic and if the roof is old and the tiles are degrading there is an excellent chance that walking on them will cause further damage leading to even more expense. Boards can be used to spread the load of walking of the roof and an experienced contractor will be aware of where to walk to reduce the risk of tile breakage.
Removing the tile
Now to remove the tile. This is probably the easiest part of the repair. If the tile is still in place then it should be levered away from the ridge, taking care not to damage the surrounding tiles and fittings. Debris should be as much as is possible prevented from falling into the roof where it may cause damage or blockages in the roof system. Consider how your waste product will be removed from the roof. Throwing lumps of clay or concrete from the roof to the garden is not a good idea. You do not have a clear view of what or who is beneath. You don’t want to go smashing the garden gnomes or worse. Consider bagging and lowering the debris to the ground.
Buying a replacement
When choosing your replacement ridge consider the colour. Yes the roof may have started out as terracotta but as it weathers and ages the colour changes. Consider the full range of ridge tile colours available from your chosen manufacturer and do not be too concerned about departing from the original shade to something that looks aged and more in keeping with your mature roof.
Now for the interesting part, how to make the repair? Recent changes to the British Standard for Slating and Tiling (BS 5534) tell us that we can no longer rely on mortar, properly mixed or otherwise to secure ridge or hip tiles to our roof. We do not need to worry about those already installed, but as we repair and replace tiles and fittings on the roof we need to ensure that they are fitted in line with the latest version of the British Standards. In this case it means that we need to mechanically fix the new ridge tile.
Find your nearest JJ Roofing Supplies store here, we have stock a huge range of ridge tiles. We also sell ridges online, you can find multiple different types of ridge tiles to fit your roof style, find your ideal ridge repair here - Ridge & Hip Tiles.
Mechanical Fixing
To mechanically fix the ridge we need to use a screw to clamp down the ridge tile into a solid section of ridge timber beneath, which has in turn been solidly secured to the roof structure. The ridge timber or “ridge tree” is secured to the apex of the rafters through the use of a batten strap. This presents a problem as if there is no timber in place already we then need to strip away several ridge tiles, not only the damaged one, to reveal the rafters either side of the repair. We can then secure the ridge timber to the top of the rafters as per the manufacturer’s instructions.
Next you need to ensure that you are able to mechanically fix the ridge tiles into the newly installed timber. If the ridge tiles do not have pre-drilled nail holes then there is cause for concern as it is not recommended that roofing products should be altered unless directed by the manufacturer in their fitting instructions. Redland removes this problem through our mortar bedded fixing kit which sits between the ridge tiles and holds the tiles edge down through the use of a metal clamp.
Once we are happy that the ridge tiles can be mechanically fixed in accordance with BS 5534 we can move on to mix our mortar and bed in the tiles in as normal, remembering to secure the end of each tile with a suitable mechanical fixing.
Buy Redland's Dry Ridge system here.
You may be thinking that this seems like a great deal of hassle. Mortaring the tiles and mechanically fixing it is essentially doing the job twice and at Redland we thought the same, which is why we promote the use of dry fix. This means we secure the tiles without the use of mortar and instead we have a system of fixings and covers to not only comply with BS 5534 mechanical fixing on ridge and hip but also to offer high level ventilation to stop condensation in your roof area. It is true that if you choose to dry fix then you are looking at replacing the entire ridge instead of just a small section, but the chances are that if one section of the ridge has failed the rest will soon follow and a new ridge system may be just what the doctor ordered.
Take a look at a full dry-fix roof installation filmed at JJ Roofing Supplies Training Centre.
Products You Will Need
Our Top Videos.

How to install a Velux Integra Electric Roof Window (5 Parts)
In this five-part guide, we take you through the full installation of a Velux GGU Centre Pivot Integra Roof Window onto an...

How to install a Duratech Centre-Pivot Pine Roof Window
Once you begin unpackaging the window, you’ll find in the box the brackets, the handle and the fixings. And there will also be some instructions...

How to install a Velux Centre-Pivot Roof Window (4 Parts)
In this four part guide, Mark Dymond – Velux Technician installs a Velux GGU Centre Pivot Roof Window onto an Interlocking Tile Roof...
Ideas & Advice
How-tos, tutorials and videos

How and why to use or snap a chalk line
Chalk lines are the fastest way to mark straight guidelines on flat surfaces. They are used extensively in the building and construction industry to speedily and accurately ‘draw’ straight lines between two points. Chalk lines are inexpensive tools...

Skylight Blinds: A Guide To The Different Types
Like many household product, blinds for skylight windows come in all shapes, sizes, and materials. Some are designed with a tangible purpose in mind, while others are more for show. One thing’s for sure - buying any type of skylight blind...