Checking and replacing ridge tiles
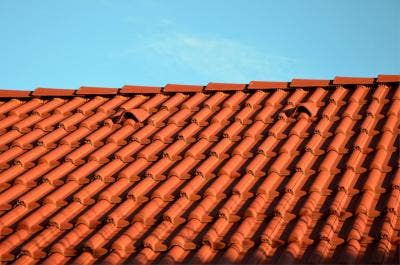
It's not just the standard tiles that are adversely affected by the inclement weather in the UK. In fact, one of the first parts of your roof to show signs of wear and tear will be the ridge tiles. The ridge tiles are the row of tiles that sit at the uppermost level of the roof and connect the point at which two sloping roof surfaces come together.

It's usually the mortar that goes first on your ridge tiles so, if this is crumbling, it's worth removing all the tiles and reseating them in place. If the mortar is degenerating, it's usually a simple task to pull the existing ridge tiles from the roof. If these are in a good enough condition they can be reused and whether they are clay or concrete ridge tiles, their re-usability is a fantastic selling point, both so that costs can be reduced by reusing the old tiles but also so that the environmental impact of your building work can be almost completely removed.
The ridge should be cleaned of the old mortar with a cold chisel if necessary so the new mortar will have a key to bond to when applied. The area should then be cleaned so it's free from dust and dirt. Particular care should be taken to remove the old mortar as there may have been additional reasons why the mortar degraded to such an extent. If the original builders used too much sand or incorrectly mixed the materials then there will be inherent degradation of the concrete and this source of potential weakness becomes the origin of a waterproofing failure.
So the new mortar doesn't dry out too quickly it's worth wetting the new ridge tiles and also the apex before laying a bed of new mortar on the roof at the point the tiles will touch the roof surface. When the mortar's in place, the ridge tiles can be fitted over the ridge and pointed so no rainwater will get through when the mortar is dry.
Our Top Videos.

How to install a Velux Integra Electric Roof Window (5 Parts)
In this five-part guide, we take you through the full installation of a Velux GGU Centre Pivot Integra Roof Window onto an...

How to install a Duratech Centre-Pivot Pine Roof Window
Once you begin unpackaging the window, you’ll find in the box the brackets, the handle and the fixings. And there will also be some instructions...

How to install a Velux Centre-Pivot Roof Window (4 Parts)
In this four part guide, Mark Dymond – Velux Technician installs a Velux GGU Centre Pivot Roof Window onto an Interlocking Tile Roof...
Ideas & Advice
How-tos, tutorials and videos

How and why to use or snap a chalk line
Chalk lines are the fastest way to mark straight guidelines on flat surfaces. They are used extensively in the building and construction industry to speedily and accurately ‘draw’ straight lines between two points. Chalk lines are inexpensive tools...

Skylight Blinds: A Guide To The Different Types
Like many household product, blinds for skylight windows come in all shapes, sizes, and materials. Some are designed with a tangible purpose in mind, while others are more for show. One thing’s for sure - buying any type of skylight blind...

Steve's Steals | Week 2 | Estwing Curved Claw Vinyl Hammers
£1 per ounce! Estwing Curved Claw Vinyl Handled Hammer.

Steve's Steals | Week 1 | Irwin Jack Handsaw 20" at only £2.50+VAT
Blimey £2.50+VAT for an Irwin Plus 880 Universal Jack Handsaw 20”/500mm, that really is a Steve’s Steal.

Steve's Steals Dropping Friday 12 April
Steve’s Steals is a carefully curated range of JJ Roofing Supplies best selling, most desirable items handpicked by Steve and priced at an unbeatable, almost unbelievable price.
Painting Roof Tiles: A Comprehensive Guide
Transforming the appearance of your home can be as simple as giving your roof a fresh coat of paint. Not only does painting roof tiles boost curb appeal, but it can also extend the life of your roof by providing additional protection against the elements. In this comprehensive guide, we'll go through every step of the process, from preparation to aftercare, ensuring a hassle-free and stunning result. So whether you're contemplating roof paint options or simply wondering, "can you paint roof tiles?" you've come to the right place. Let’s dive in.
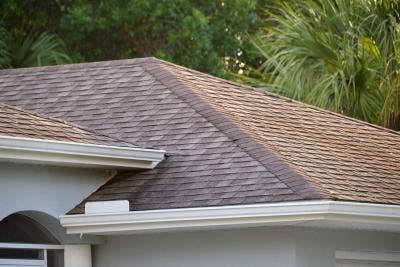
Shingles vs. Tile Roofs: Pros, Cons, and Comparison
When it comes to selecting the right roofing material for your home, it's essential to weigh the pros and cons of the two most popular choices on the market: shingle and tile roofs. This comparison will guide you through the critical factors to consider, such as longevity, cost, and aesthetic appeal, ensuring you make an informed decision tailored to your needs and preferences.